WPL Build
This page teaches you how to use the in-browser WPL Archive Builder.
1. Getting started
Create a project
When you first log in, you will be presented with the projects panel.
- Create a project by clicking
Create Project - Open the project by clicking
Edit
2. Build a collection
The Editor
Inside your new project, you will see a blank editor
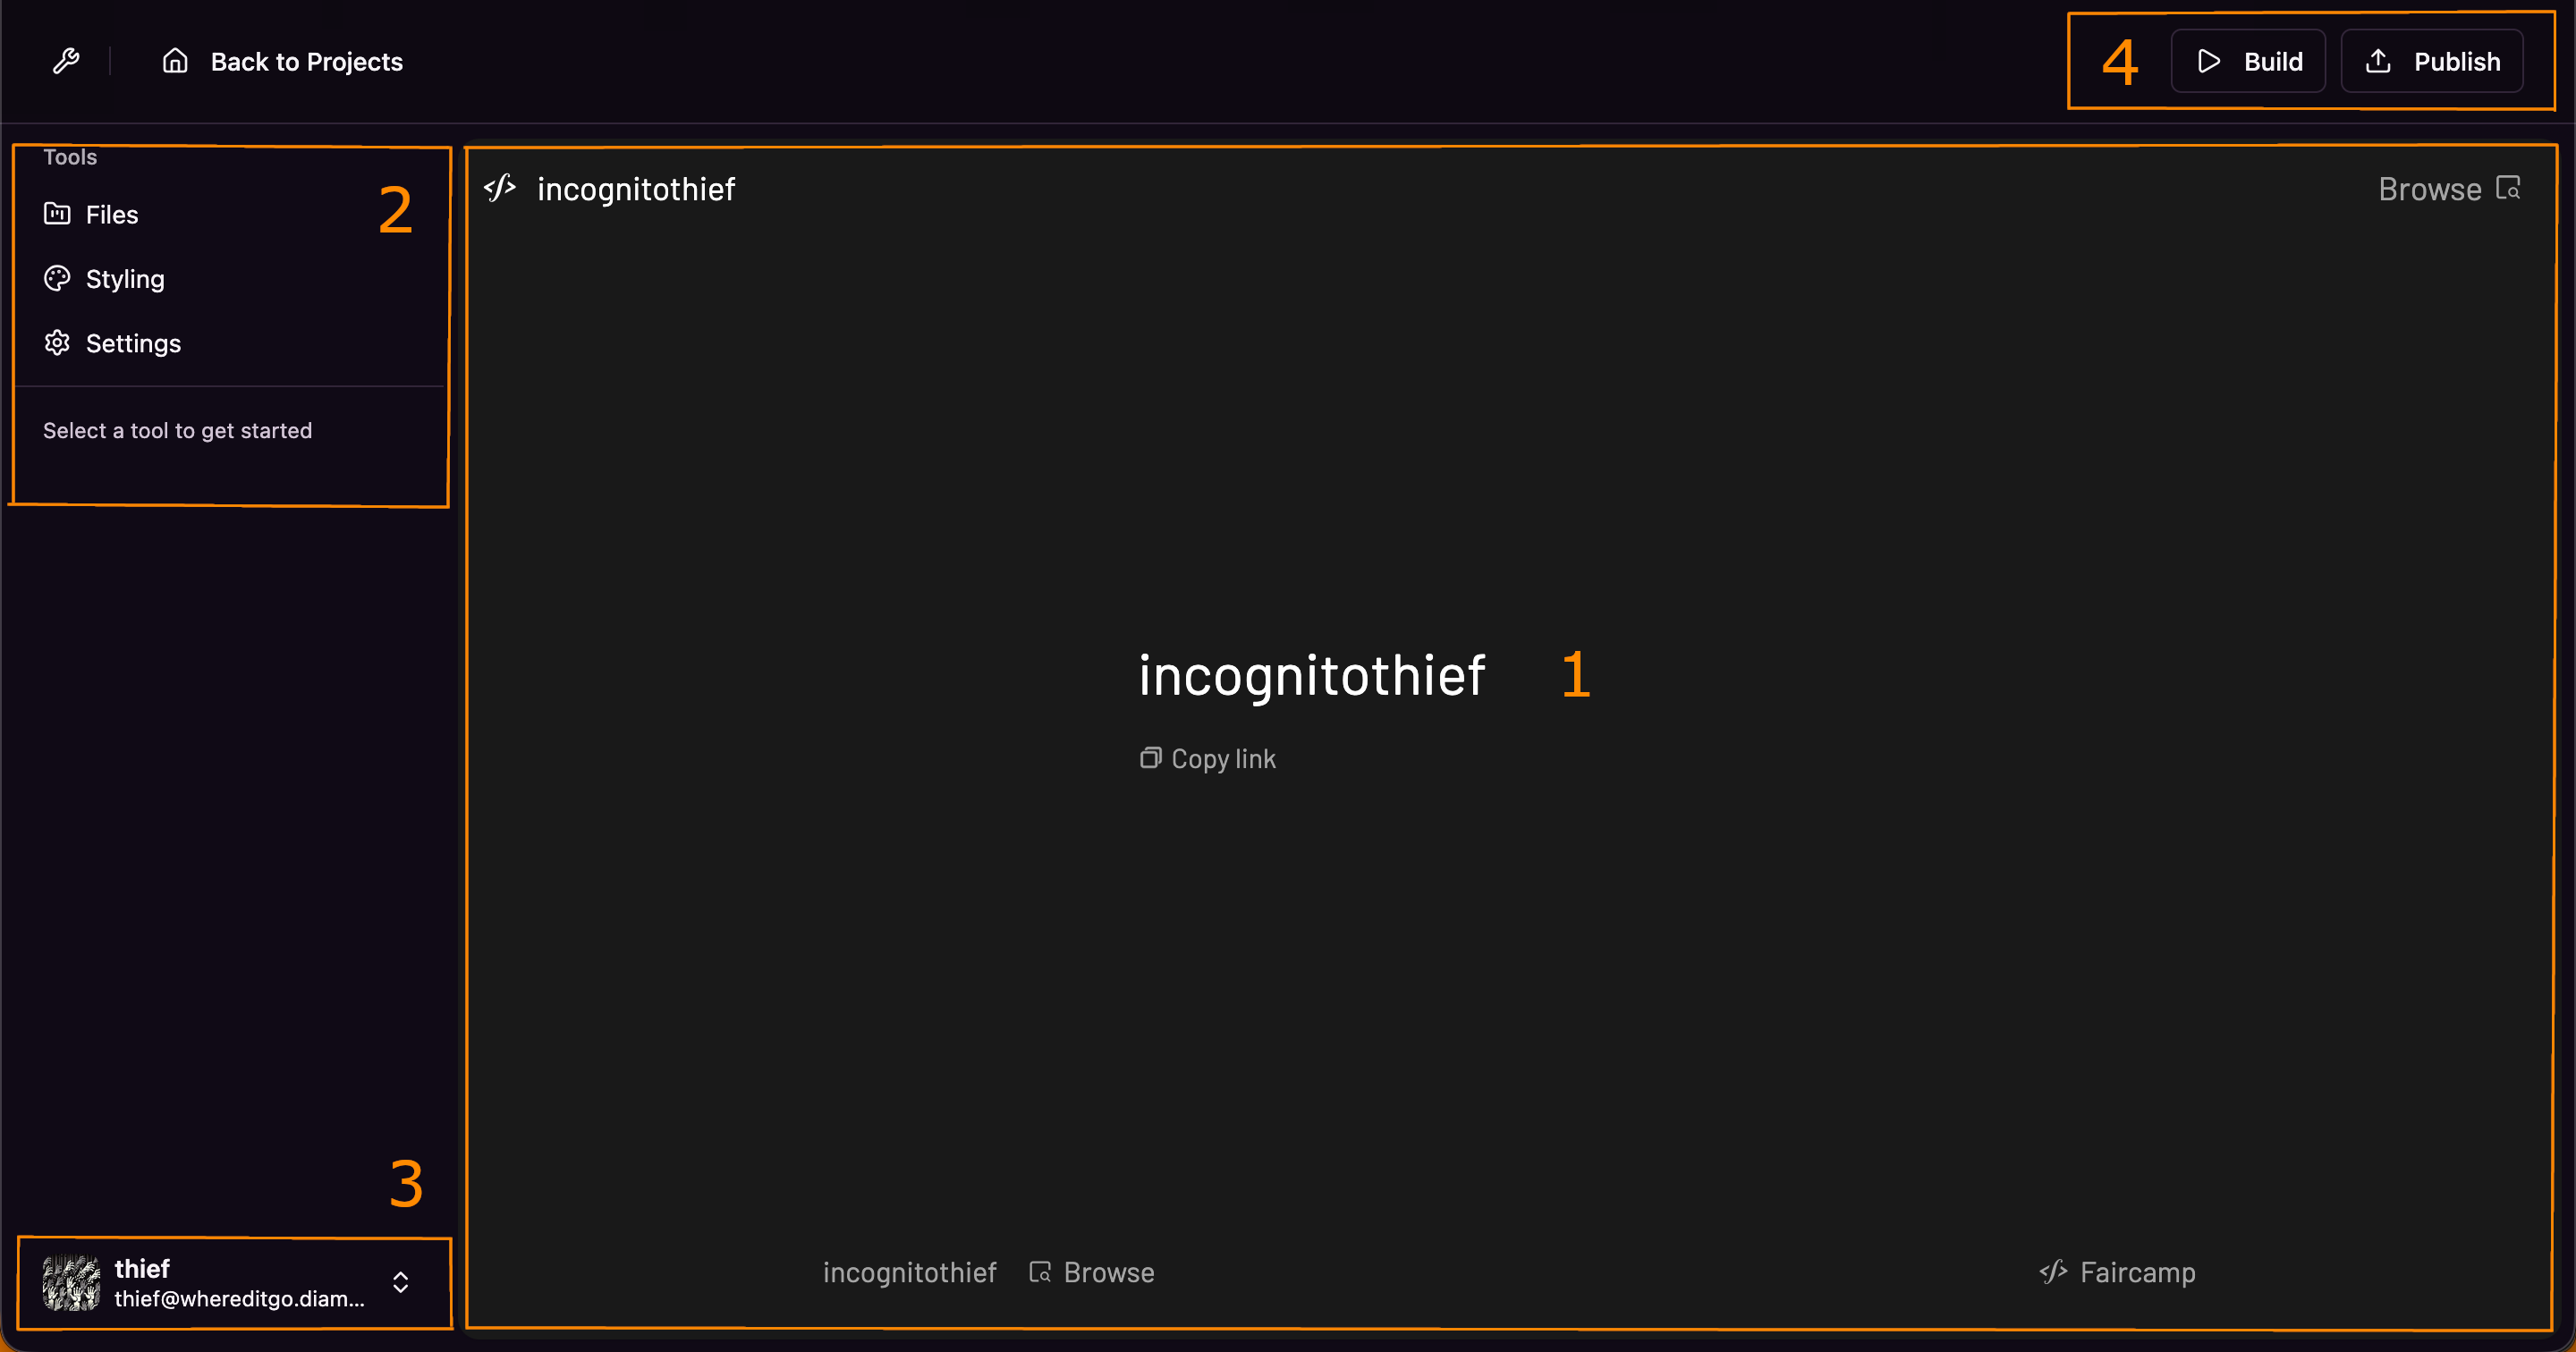
- Preview window. Shows a preview of your archive
- Toolpane. Tools to modify your archive
- Preferences menu. View account stats + settings
- Workflows. Use these menus to build and publish your archive
Create a collection
- Open the Files tool and click
Create Collection - Click on the collection name to expand its contents
You will notice that your collection is empty
Add your audio, etc. files
- On the collection, click on the three dots TODO: More vertical to open the context menu
- Select
Upload Files
You can upload audio and cover art + any other files you want bundled in your project.
(example: liner notes, alternate artwork, message to the listener)
Reorder and Delete Items
In case you need to re-order any tracks, click the Reorder button to unlock the the list, then drag your tracks into the correct order
To delete a track or collection, use the context menu
3. Add Metadata
Cover Art
If you uploaded artwork in the prior step, you may notice that the artwork is not visible in the preview
- Make sure you have an image uploaded
- Open the
Edit Metadatamenu - Select your image in the
Cover Imagedropdown
Release Date
The release date of each collection will determine the order that it is presented. To configure the release date:
- Open the
Edit Metadatamenu - Set the
Dateto when the project was released
Renaming Tracks/Collections
To Rename the collection, or any files, use the Edit Metadata menu
Adding Collaborators
Collaborators are listed on each track page. To add a collaborator:
- Open the
Edit Metadatamenu on the target track - Type a the name of your collaborator and press Enter
4. Styling your Archive
The appearance pane can be used to change the colors of your site, or add custom images
The project settings pane can be used to modify homepage elements such as adding a custom link, extended descriptions, and more

5. Publish Archive
Run the Build Workflow
To compile all of your assets into an archive, run a build job by clicking the Build workflow
Run the Publish Workflow
Once your build has complete, be sure you have chosen a subdomain from the preferences menu and run the Publish workflow
